Thursday, 29 March 2012

Race Scooter: On the mend

To be perfectly honest, I wasn’t looking forward to working on the bike. Previous experience has taught me you can never be completely certain of the repercussions of one broken part on many others. One such experience was at Cadwell Park in 2011. My Dad’s inner clutch basket disintegrated at the brazing and caused the springs to shoot all over the engine, mashing up in the gearbox... on the starting line.

This left me thinking I wouldn’t feel completely satisfied until I had fixed the issue and had also made sure that it couldn’t happen again. As you could see from the damage, a little elbow grease was required. As it happened, repairing the issue in this instance is also the solution. Using some coarse and then fine grinding paste, the two affected parts were mated to solve the issue.


Part of the initial problem anyway was that the parts had not matched correctly allowing the keyway and nut to be under more strain than intended. Matching the two parts resulted in the tapers having much more surface area in contact with each other, allowing a better fit under the correct torque, hopefully eradicating the issue. After, performing this work, which took quite a while, the bike was assembled and then tested.


The good news was that the fix had worked and I felt comfortable that it would stay fixed. As such, quite to my disbelief, I appear to be ready for Mallory Park already. (I am missing Croft due to a holiday to Spain). The not-so-good news is that there are a few things that I would like to do before that meeting, all small things but they all add up and I have a limited amount of time. A spare stator is on the cards for the next meeting but plans for beyond are up in the air. Mind you, if past experience is anything to go by, there will still be plenty of things to blog about.

Race Scooter: All events occurred 25th March 2012

Sunday, 25 March 2012

Test Day 2012: Mallory Park

Over two years since the start of this blog, god knows how many man hours and a few thousand of the Queens notes later and I had arrived at my goal.  The test day was the mental and physical crossroads that I needed to enable me to answer a few questions I had for myself. For a start: Would I enjoy it? Would the bike perform as I expected? Had this all been a waste of time, effort and money? The chances of my failure were higher than usual though as I was a novice novice! I had only ever ridden a Lambretta for about 400m let alone a race scooter producing over 3x its original power.

Waking up rather early and arriving in plenty of time in the Mazda Bongo, by 07:30 we were at the trackside and by 08:00 we were pretty much set up for the day ahead. After a few nervous pictures and a bit of tinkering, I was comfortable and ready for everything to be checked over. Race Scooter and protective clothing checked, I signed on and was ready for what the day had to offer.


Prior to the first session, I had to adjust my carburettor needle as we wanted to go for a safer, richer mix due to the results from the dyno session. I rode around a little in the paddock before the first session to get used to the clutch, gears and handling but it didn’t turn out to be much preparation in the grand scheme of things. It wasn’t long before the first event was upon me and out we went.

After a few laps, getting used to the machine and myself, I started to feel okay. My worst part was coming out of Edwina’s where I couldn’t quite get the knack of getting into third gear in a smooth fashion. After what I think was three (maybe four or even two) laps, I had a larger issue out of Edwina’s...


The symptoms were that the bike just died on me; luckily I was pretty much opposite the track exit so luck was on my side a bit. I suspected a snapped throttle cable and on arriving back to the paddock, it turned out to be less serious; carb needle retaining bolt on the slide had vibrated loose. I was completely to blame for this as I had messed about with it that very morning when richenin her up. Oops. This issue fixed, I waited for the next session, planning a plug chop to see how the carburetion was doing.

At first, when the engine was started, I was having misfires but just before I went to ride back to the camp, the issue cleared and I went out for what turned out to be the best 15 minutes I have ever had on two wheels. It took me a few laps to get used to but by the end of the session, I felt I had mastered the Edwina’s gear change and my worst part had changed to the Gerrard’s entry which gave me a few wobbles. Plug chop done at the end of the race and the colour was perfect for a running-in day.

That however, is where the good news stopped. On the next session, the same misfiring was back and this time, it didn’t clear. I came back in puzzled, hoping it was the spark plug but after a few plugs we gave up for that session and started to look at the electrics. The main hope was it was the stator, which would have been a straight swap-and-go job. On removing the flywheel weight though, things became a little clearer.


The flywheel weight, which didn’t have the best taper fit , had loosened slightly, “fret welding” itself to the crank. This was down to a poor fitting taper and bad preparation by myself. Even after this issue though I was grinning and still am while I write this. Something to fix from a test day isn’t ideal but that is what the day was for.


Even better news that I forgot to mention was that I grounded the exhaust, proving the added plate worked well at protecting the exhaust. The tyres seemed to work well too, even though I wouldn’t know, and the chicken strips aren’t too wide.


I spent the rest of the day spectating and it turned out to be a really good laugh. I met some more great, interesting people and rode alongside some that I have been watching for years. I’ll make a few thankyous as usual and not surprisingly, Chalkie and Ciro of Replay Scooters and everyone at DKS are there having been a big help in setting me up for 2012. The biggest thankyou I can give though is to my Dad, who has helped me through all weather, gave me the inspiration to want to give it a go and for spectating on this special day.


Race Scooter: All events occurred 22nd March 2012

Monday, 19 March 2012

Dyno run and KAS Racepaint (Batch Three)


So after all of this time – over two years – the penultimate weekend has been and gone. Back to work Monday, Tuesday and Wednesday, Thursday is testing. What can I say? I’m excited, nervous and happy to be finally on my Race Scooter. I’m looking forward to meeting a few new people and putting a name to a face with others. This season is certainly looking already very exciting and is going to be very special to me.

The wet tyres were built midweek incase Mallory Park testing turns out to be a wet day.

 
Anyhow, back to the bike and despite not having many pictures to show, a lot of finishing off has been done. On Saturday afternoon, the bike was taken over to Replay Scooters and given a dyno run. As has become the norm with these posts though, and so I’m told with Lambrettas, things didn’t go quite to plan.

For a start, we quickly realised that we didn’t have a racing spark plug in the engine, which caused a bit of misfiring. When a racing plug was fitted, whilst it was clearing, the engine backfired, through the carburettor, into the face of an observer – me. It gave me the fright of my life.

After diagnostics on the dyno, we found out that we had an electrical issue, which turned out to be the stator. On the next run, the bike appeared to run out of fuel; it transpired that the spark plug had also broken. One new plug later and we got a few good runs. The results told us that we needed to adjust the carburetion.

Overall, I was positive with the results though. She sounds fit and didn’t fall to bits! After what transpired to be a long time there, we left in high spirits to do some final tinkering.

On the Sunday, I received KAS Racepaint Batch 3 which was the final parts. They look excellent. They make my temporary paintwork look a lot less professional than I hoped – not surprising though. They are so shiny that you can see your reflection in them!


Throughout the rest of the day though, floorboards were firmly attached, paintwork finished and a ton of small things that annoyed me were addressed.

“Pictures of the finished Scooter?” I hear you asking. Come to Mallory Park, visit the fast scooter forum or visit the Race Scooter blog on Thursday to see how we get on.

Big thankyou to the tuner.
Good luck to racers.
Cheers to the supporters.

Race Scooter: All events occurred 17th March 2012 to 18th March 2012

Saturday, 17 March 2012

Bodywork, electrics and timing

With the grin still on my face from yesterday, I was up early outside with the bike. The first thing I did was to finish off the exhaust bracket. This wasn’t too bad as it was only a bit of smoothing and making it look presentable. The next task was to look at was the ignition timing. I made the connections on the Koso Rev counter I’d acquired some years ago and fitted the exhaust on its new bracket, which took much longer than it should have done.


Starting the bike was much less dramatic than the previous day. I took the pilot mantle and the only reason it didn’t start first time was due to me not giving it enough revs; I was too eager to look back at Dad to show I’d started it. After the second attempt, we got the strobe on it and saw it was slightly advanced. Those marks I had made yesterday came in really handy.

As the flywheel had to come off anyway, I decided to change the bolts and nuts to give the exhaust more clearance. This was more good practice with the engine as I adjusted all it myself using a timing disc. I was chuffed to get the bike back together in rather a fast turnaround.


Before the next start though, I wanted to connect the kill-switch and all electrics to make sure it was fit for the test day. Soldering is something I quite enjoy but unfortunately, today was not my day. The solder and wire just weren’t fit for each other. So I borrowed my Dad for a while to help. Even he struggled, which although wasn’t great, it made me more positive that I had been failing. Molten solder went everywhere!


Whilst he got on with these tasks, I started to finish fitting the bodywork. The first thing I had to do was adjust the steering stop as I had noticed some issues with it yesterday when trying to turn it around on our drive. The timing disc came in pretty handy to keep the steering limits within the BSSO regulations. After this fairly simple task was complete, the mudguard, horncast and grill went on very well if taking longer than I would have liked. By the end of the day, I had fitted the remaining bodywork and Dad had finished with the soldering.


Taking a few pictures to reward myself made me so proud of how far I had got. Only a few more bits to do but I am especially happy with the progress of things.


Race Scooter: All events occurred 11th March 2012

Wednesday, 14 March 2012

Is today the day?

As last weekend had ended so positively, I wanted to ride the wave of success and get as much done as possible. In terms of starting the bike for the first time, I was only a few steps away but they were rather large steps. As you can see from the photo, last week I had also managed to connect the tank, which I forgot to mention in the last blog post.


The first visit on the cards was to KAS Racepaint and the trip was rewarded with a nice chat and collection of my steel rims. As soon as I got home, the rims were coated silver with as close a match to the alloy colour as possible.


Shortly afterwards, the mandatory visit to Replay Scooters with some parts of Dad’s 2011 engine was made. We also wanted had to obtain some information on ignitions. The visit coincided with Steve Conneely's visit too. His bike not only looks great but sounds the dogs too! The cinnamon coffees finished off the trip and I had some encouraging words from Steve and Chalkie regarding the blog which made me a happy.

In terms of staring the bike, there were just two things that needed to be completed, the front brake, and the exhaust mount. Having swapped out the existing Nissin master cylinder for a Grimeca one (which we have more spares for) last weekend, after leaving it overnight for the bubbles to enter the master cylinder, there was still no pressure.

This was strange primarily because we had only disconnected the master cylinder meaning, in theory, every component below i.e. hose and slave cylinder, should remain as before. As we didn’t know the history of the master cylinder though, we were in doubt of its functionality. Before we swapped it out for the original one though, we thought we’d give one more thing a go.

Equipped with a hose, syringe and spanner, we stared to bleed the fluid into the hose, we filled the syringe from the master cylinder and forced some fluid in. Assuming the bubbles were at the top of the hose we guessed that by now we should have been feeling some pressure. Unfortunately, there was no pressure.

However, in the following minutes we solved it. By sucking fluid, it became apparent that there was air in the slave cylinder?! Recycling the sucked fluid into the master cylinder ended with a fully bled brake line. The only minor issue was on the last lever squeeze, the syringe actually exploded in my Dads face. A bit of water got the fluid off and despite the hiccough, the brake felt fantastic. It didn't take too long to have the routing sorted either.


As the exhaust was off, I took the opportunity to make some timing markings on the magneto cover as I had been told the ones already there were probably no good. Using a trusty dial gauge in the spark plug hole, I marked top dead centre (TDC). I also made some marks at 15 and 20 degrees before TDC in order to strobe her up.


The last steps were to reattach the exhaust and make the temporary electrical connections. The exhaust was done with the unfinished bracket and was very quick to do; I’d had some practice with it. The electrics were also pretty much in place so those connections and checks went without issues.


The bike was pushed in trepidation up the drive and the fuel and choke turned on. I popped it in gear and pushed. Seconds later, realising our efforts were futile, we stopped. The clutch most definitely needed adjusting. A few more minutes passed and the second push, this time solo, also went without a peep from the engine. I gave in and let the older, more experienced rider be the pilot and I went back to my more familiar pushing, something Chalkie and others who have seen me about the paddock can tell you many a story about.

The first run was good we had a couple of fires and simply ran out of road. Second try and I told Dad to not start it so we could get third time lucky for the audience we had (Mum and Steve of Ambivent). Unfortunately though, it started! What a shock. It was fantastic. My dream was coming true. We spent the next few minutes testing the machine up and down the drive. Brakes, clutch and suspension all felt really good. One thing to fix was the steering stop, which made the turning circle really bad. But I’d had one massively positive day. Really great! Smiling and shaking with adrenalin, I put the bike on its stand for some fixing and fettling the following day. Fredo Frogs and Fudges all round!

With the short amount of time I had left, we fitted some M8 retaining nuts on the exhaust bracket to make life easier with it coming on and off. The evening was cut short though with a night out to celebrate.

Race Scooter: All events occurred 10th March 2012

Monday, 12 March 2012

Cabling, wiring and the elusive spark

Last Sunday I gave you an update on the paintwork. In one of my comments though, I confessed to it being a ‘backup’ post. I had just about fully prepared the panel work in parallel with the bike so it only seemed right to show all this work before it was fitted. However, last weekend I was doing something a little different.

For starters, I must admit to having a long weekend available to me having booked the Monday off. Nonetheless, I had my targets and set off to complete them early on the Saturday morning. A couple of errands here and there including visiting Replay Scooters set the morning off to a good start.


The main priority was to get the rear brake sorted as it was a design copy from my Dads race scooter. A new adjustable cable was purchased alongside some cable nipples for the gears and clutch. As the brake was reverse pull, and was not a standard length, a outer cable needed to be sourced. After viewing some handbrake cables, a better (cheaper) solution was found in that of an outer we already had. Due to the generous length of the new inner cable, we even managed to utilise one of the original brake cable clamps.


After an afternoon, we had connections on the gears, clutch and rear brake all operational. This however is where we started to hit the problems.

The first of which was the throttle cable. I had yet to complete the cam in the headset so this needed to have some time spent on it. A few holes drilled had the cam sorted but the spring return needed modification as it became coil bound rather quickly. I also needed a better positive stop as the solution I had found not only wasn't properly secure but rubbed against the headset top and allowed the throttle to stick open – not good.


The cable fitment provided the next issue. The choke fittings on the carburettor were not the cable type so this had to be sorted. For a start, we had to steal the parts from a spare carburettor. Secondly the cable was too long so needed to be shortened, which was done in a guess described by my Dad as ‘jammy’. Lastly, the choke lever/cam needed to be sorted as its operation and the positioning could definitely be described as Indian.

And I hear you asking; what about the front brake that’s the last thing?! Then you can bump-start the beast right?! Wrong. We will visit the brake issue in the next post.

It was not until this point that I had even attempted to get a spark. Excitedly, connecting all of the electrical cables (and making sure to have connected the earth from chassis to frame) we span the back wheel, hoping to see a bright blue spark jump from the bare HT lead to the cylinder head. Nothing. Spin it faster. Nothing. I was gutted. We even checked everything twice and saw no mistakes. Those familiar with race scooter electrics will know that there isn’t actually much to check.


Dad yet again came to the rescue though and referred to Sticky’s manual for testing the stator. One of the readings was very intermittent. This was actually great news. I have never known one of our issues to be identified as quick. I just needed to take it to Replay to get the issue confirmed. The Sunday night was nearing its end and a few more trivial things were completed but I still had the ace card – the Monday off.

Monday morning came and I was out in the garage bright and early. I began by fitting the Legshields as the rear brake was the only thing that was stopping me before.


After this rather rewarding task, I popped over to Replay to sort the stator. When Chalkie tested the readings though, they were fine – weird. However, he did find that there was a spacer plate underneath the pickup which could have meant the pickup was out of alignment with the flywheel. So after removing this, I went home in hope of obtaining that sought after spark.


After fitting, unfortunately, there was no spark which was most puzzling; yet another trip over to Replay. This time Ciro looked at it and immediately spotted a loose – well detached – earth wire. Brilliant! There was the issue, as plain as the nose on my face. A bit of solder later I hopefully had a working stator. Cinnamon coffees all round on me.


However, despite the trips when I put it back on I had no spark. After double checking everything twice I could not see the issue. Then, I had a brainwave: I wonder if I need to reattach the pickup spacer? No more than five minutes later, a nice spark could be seen on spinning the flywheel; success!

The long weekend was finished off with the semi-manufacture of the new, safer exhaust bracket and a mould. Both of these pieces will need more work so expect progress pictures in the following posts.


Race Scooter: All events occurred 3rd March 2012 to 5th March 2012

Sunday, 4 March 2012

Temporary Bodywork - An Overview

This post has been building up for quite a long time. The purpose of it is to show you the entire process of producing my temporary bodywork in one, large, post. This is one of the Scootering promotional shots I took along the way and when you see what I started with, I hope you can see the hard work I've put in.


The sidepanels took a long time to prepare! Their purchase even pre-dates that of the ex-DKS spare bike. They were seen at Wicksteed Park Scooter Fair back in late 2011 and were purchased with the intention of having a spare pair of "rough" panels (to be used for track days, practice etc). In all honesty, the more I did on them, the better I wanted their finish to be.

For a start, they had been down the tarmac their fair share of times and had been trimmed in places unsuitable to me. However, after a kind dose of fibreglassing and filler, I had got them to a much better state. I even went to the trouble of strengthening the weaker places at the same time.

As with most fibreglass panels, they did sit quite high on the frame loop, so using a router we had the flanges at a depth much closer to the original metal parts. As you can see from the photos, a fair few layers of paint were added in addition. I decided to leave them in their matt 'pimer' white, giving them the mandatory numberboards in blue. I also manufactured some decals from some special printer paper, giving the bike that well-prepared, professional look.

After a bit of satin black paint on the inside and the panel louvres fitted, they are ready for fitting. Here is the photo set of the progression:


The Legshields were another area where I spent a lot of time. I struggled to find any cheap temporary legshields locally, so decided to use the ones from ex_racer 81. However, there were a few things to fix first, for instance, there were a number of damaged areas that needed weld repairing (thanks to Replay Scooters). Aside from the time spent straightening these out, luckily after a handfull of hours of preparation, I started to paint them. Again the progress can be seen in the following shots. My favouite parts were definitley the finishing features.


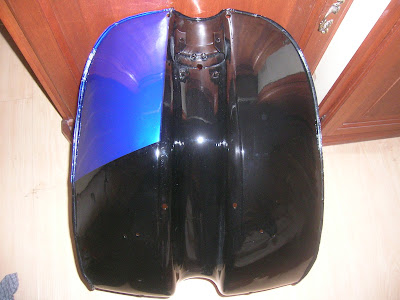
There were a few other bits which I had put aside for spares which I decided to use for this paintwork iteration, these being the Horncasting and Front Mudguard. As such, very little was one to these, nothing that a little elbow grease wouldn't sort out anyway. The spare floorboards were recycled from the DKS ones and were given a coat in satin black to blend in with the rest of the scheme.